Showing posts with label DIY Lessons with MissPinkyBinky. Show all posts

Tuesday, May 8, 2012

DIY Lessons with MissPinkyBinky: Rainbow Rhinestone Necklace

I've been obsessed with neon  colored accessories but since I'm a budget fashionista, I never really spend too much on accessories. It's either I'd buy accessories from my secret places or I'd make my own. Recently, I've been so attracted with these rainbow colored crystal/rhinestone necklaces. Not knowing where to get them, I thought of making my own. Yes these "pang beauty queen" necklaces are very common. But i haven't seen them in rainbow colors. I never thought I'd be able to appreciate these kinds of fancy jewelry. Haha. Here's a very simple step you can do at home to transform that "pang beauty queen" necklace into a trendy rainbow colored statement necklace.

INSPIRATION

 First and second image from http://www.etsy.com/shop/DolorisPetunia


WHAT YOU NEED:


The cheap ones didn't work. The ones I used are from Sally Hansen, Face Shop and Wet and Wild.


The only thing you have to do here is paint it the way you like it. You can experiment with colors or patterns and you're good to go. I'm not sure of is how long the color can stay but what I'm not definite about is that they're fab enough to compliment my outfits! :)


Friday, April 27, 2012

DIY Lessons with MissPinkyBinky: Dip Dye Shorts

I felt really bad when I accidentally bleached my peach shorts from Zara after putting my wet, colorful scarf on top of it. I thought it was already hopeless because it didn't even pass as my favorite "pambahay". For a year, it became one of the forgotten items in my closet. If not for the dip-dye trend that became a very hot summer trend, I wouldn't have remembered it. I was actually thinking of bleaching my white shorts but then, tadah! I saw this in the far corner or my closet while I was looking for my white shorts. Below, I wrote a blow by blow process on how to achieve the perfect dip-dye look for your old shorts. :)

 Here's how it looked like before I dyed it.


 What you'll need:
       Venus dye (color of your choice)
       Old shorts
       Zonrox


First thing that you have to do is dye your shorts in to your desired color. In the case of my shorts, it's original color is peach so i decided to use orange dye. Here's how it looked like right after...


I didn't like how the color turned out so I soaked it in a Zonrox+water solution for a few minutes to achieve a washed look. I forgot to take a photo of it after the first wash/soak but I hope you can imagine it. After the first wash, I soaked the bottom portion of my shorts in pure Zonrox to wash-out the color completely. Here's how it looked like after 2 washes... 


After achieving the desired color and look, saok it in water then let it dry. After doing these easy to follow steps, all you have to do is style it. You can either cut it into your desired length, add studs or fray the hem and voila!

So how do you like my not-so-new-new-shorts? I can't wait to wear it! :)


Thursday, August 11, 2011

DIY Lessons with MissPinkyBinky: Lace Trim Mini Skirt

Just last week, I decided to go on a shopping ban until September so I can save for our trip next month. And because of this rule which I intend to follow as much as I can (haha), I'm pressured to make use of the resources that I have. Here's a very simple DIY tip which you can do if you want to re-invent something from your closet.

What You'll Need:
     mini skirt
    1 yard lace


What I Wore:
top from Pink Clothes,
skirt from Surplus Shop (DIY),
floral maryjanes from Forever21,
pearl and chain bracelet, made by me
scarf (worn as belt) from Brunei


Thursday, June 16, 2011

DIY Lessons with MissPinkyBinky: Intertwined Turban

It's been a while since I last posted simple DIY lessons here. This is actually just my 2nd. I create a lot of things every once in a while but the thing is, I don't have the time to document the steps since I'm a bit impatient when it comes to my creations. I tend to work fast because I'm always excited to see the finished product. So anyway, here are a few steps on how to make a turban that's intertwined.

Some of the headbands/turbans I've made. :)

Follow these simple steps and you'll have your own in no time! :)

Sorry I forgot to include the last step which is to ATTACH through stitching! I hope you can picture it out.. :)

And here's my latest Lookbook post. Don't you think the colors are all too yummy? Hope you like it!

top from Binkydoodles (will be available very soon),
electric pleated sheer maxi pants, my design,
suede strappy platforms from Jellybean,
accessories from my secret place,
intertwined turban, made by me

Can't get enough of yummy colors? Here are photos of  Liz from Late Afternoon. I really love her easy breezy style. Visit her blog to see more of her looks! :)


Friday, April 22, 2011

DIY Lessons with MissPinkyBinky

I've been thinking of including a DIY section here in my blog. How would you like that? So to start off, here's a very simple DIY project you can try at home.

DIY Project Number 1: Tassel Earrings


            What you'll need:
1. 2pcs tassels
2. 2pcs hooks
3. 2pcs clips
4. pliers
5. scissors

Do I need to explain the process? :p
 

Finished Product
.
In as easy as 1, 2, 3, you now have a new cute pair of earrings! :)
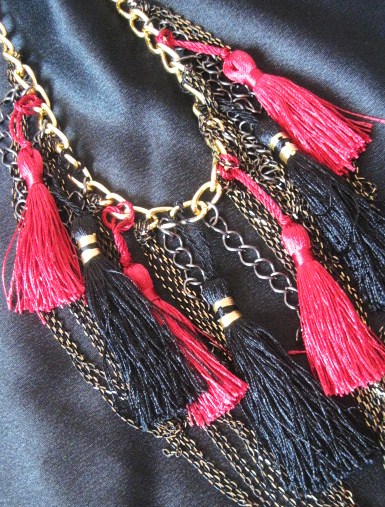
Here's another simple DIY project. I made this necklace to match the dress that I made for my final project in Sewing. I failed to document the process though so let me just do another similar project soon. Will post my pictures wearing this necklace with the dress soon. :)


Check back again soon for more DIY Lessons with MissPinkyBinky. :)